Wednesday, 6 November 2024
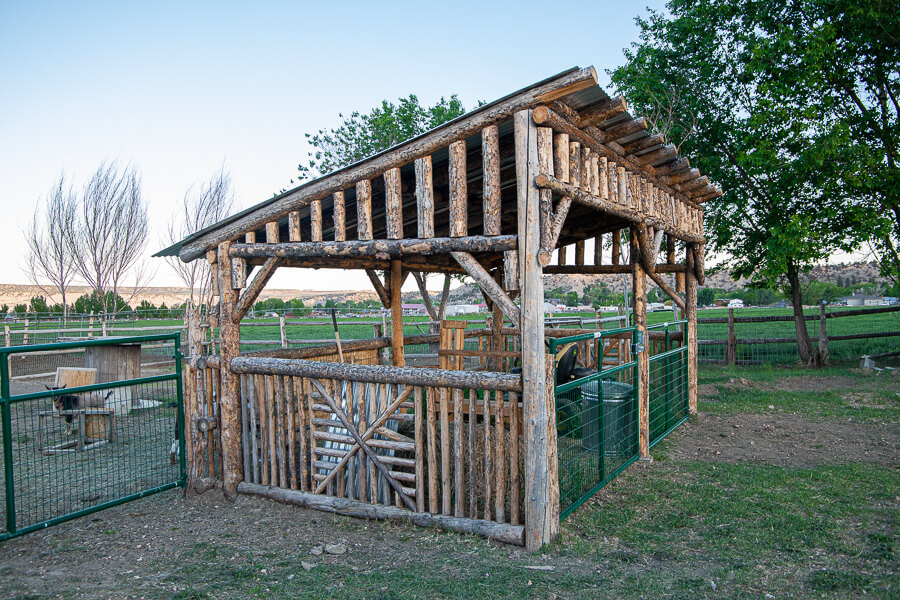
How to create a diy pole shed that won’t break the bank

Alright, so you're thinking about building a pole shed, huh? You want some extra storage space, maybe a workshop, or maybe just a place to keep your lawnmower out of the elements. I get it! I've been there. But you don't want to spend a fortune on a fancy, pre-fab building, right? You want to do it yourself and save some dough. Well, you're in the right place, my friend.
Let's Talk Basics
First things first, let's get the terminology straight. A "pole shed" (sometimes called a "pole barn") is basically a building that's supported by strong posts driven into the ground. These posts are the "poles" that give this type of structure its name. They're often made of treated lumber, and they're usually set in concrete to make them extra sturdy.
Think of it like a sturdy, open-air tent, but with walls, a roof, and the ability to withstand Mother Nature's best shot (and maybe even a few snowstorms).
DIY: The Thrill of the Build (and the Savings!)
Now, building a pole shed yourself is definitely a DIY project for the ambitious. It’s not as complicated as building a full house, but it does involve some serious work. But here's the good news: It's totally doable, and it can save you a ton of cash.
Step 1: Planning is Key
Before you even think about digging a hole, you need a solid plan. This means:
What are you using it for? Storage? Workshop? A combination? This will help you determine the size you need.
Location, location, location! Pick a spot on your property that's level, well-drained, and has easy access. Also, check with your local building department. Some areas have building codes or permits you'll need.
Drawing it out: Sketch out your shed on paper (or use a free online tool). Decide on the dimensions, the height, the door placement, and any windows you want.
Choosing materials: Lumber, roofing, siding, and doors â€" you'll need to decide what kind of materials to use.
Budgeting: Estimate the cost of materials, tools, and any permits you may need.
Step 2: Laying the Foundation
Now it gets real. Here's what you need to do:
Dig those holes! You'll need to dig holes for the posts that will support your shed. The depth and size of the holes will depend on the type of soil you have and the local building codes.
Set those posts: You'll need to set the posts in concrete. Make sure they are perfectly plumb, level, and spaced according to your plan.
Getting the concrete right: You'll need to mix and pour the concrete. There are a few different ways to do this. You can buy pre-mixed concrete, or you can mix it yourself.
Step 3: Framing the Walls and Roof
Once the concrete is set and the posts are solid, you're ready for the next phase:
Attaching the wall and roof framing: This is where you'll attach the horizontal and vertical framing members to the posts. This will create the skeleton of your shed.
Sheathing: You'll need to attach sheathing to the framing. This is usually plywood or OSB (oriented strand board). It will provide a solid surface for your siding and roofing.
Step 4: Siding and Roofing
Time to get creative! Now's your chance to add some personality to your shed:
Siding: You can use a variety of materials for your siding, like wood, vinyl, or metal. Choose something that complements your house and matches your budget.
Roofing: You'll need to install roofing material on the roof. Shingles, metal roofing, or even corrugated metal are all good options.
Step 5: Doors and Windows
Now for the finishing touches:
Doors: You'll need at least one door to access your shed. Choose a door that is the right size for your opening and style.
Windows: Windows add light and ventilation. You can choose from a variety of styles and sizes.
DIY Wisdom: Tips and Tricks
Building a pole shed yourself is a journey, not a race. Here are a few tips to help you along the way:
Don't be afraid to ask for help: Enlist friends, family, or even a neighbor with some construction experience.
Take your time: Rushing things can lead to mistakes. Take breaks when you need them and make sure you're comfortable with each step before moving on.
Safety first: Wear safety glasses, gloves, and a dust mask when working with power tools and lumber.
Measure twice, cut once: Double-check your measurements before you cut any wood.
Check your building codes: Make sure you're following your local building codes.
Use quality materials: Don't skimp on quality lumber and fasteners. It will make a difference in the long run.
The Final Word
Building a pole shed yourself can be a rewarding experience. It's a chance to put your skills to the test and save a lot of money. Remember, it's a process, so take it one step at a time, and don't be afraid to ask for help when you need it. And above all, have fun! You'll be amazed at what you can accomplish with some planning, some effort, and a little bit of DIY spirit.


No comments:
Post a Comment
Note: only a member of this blog may post a comment.